
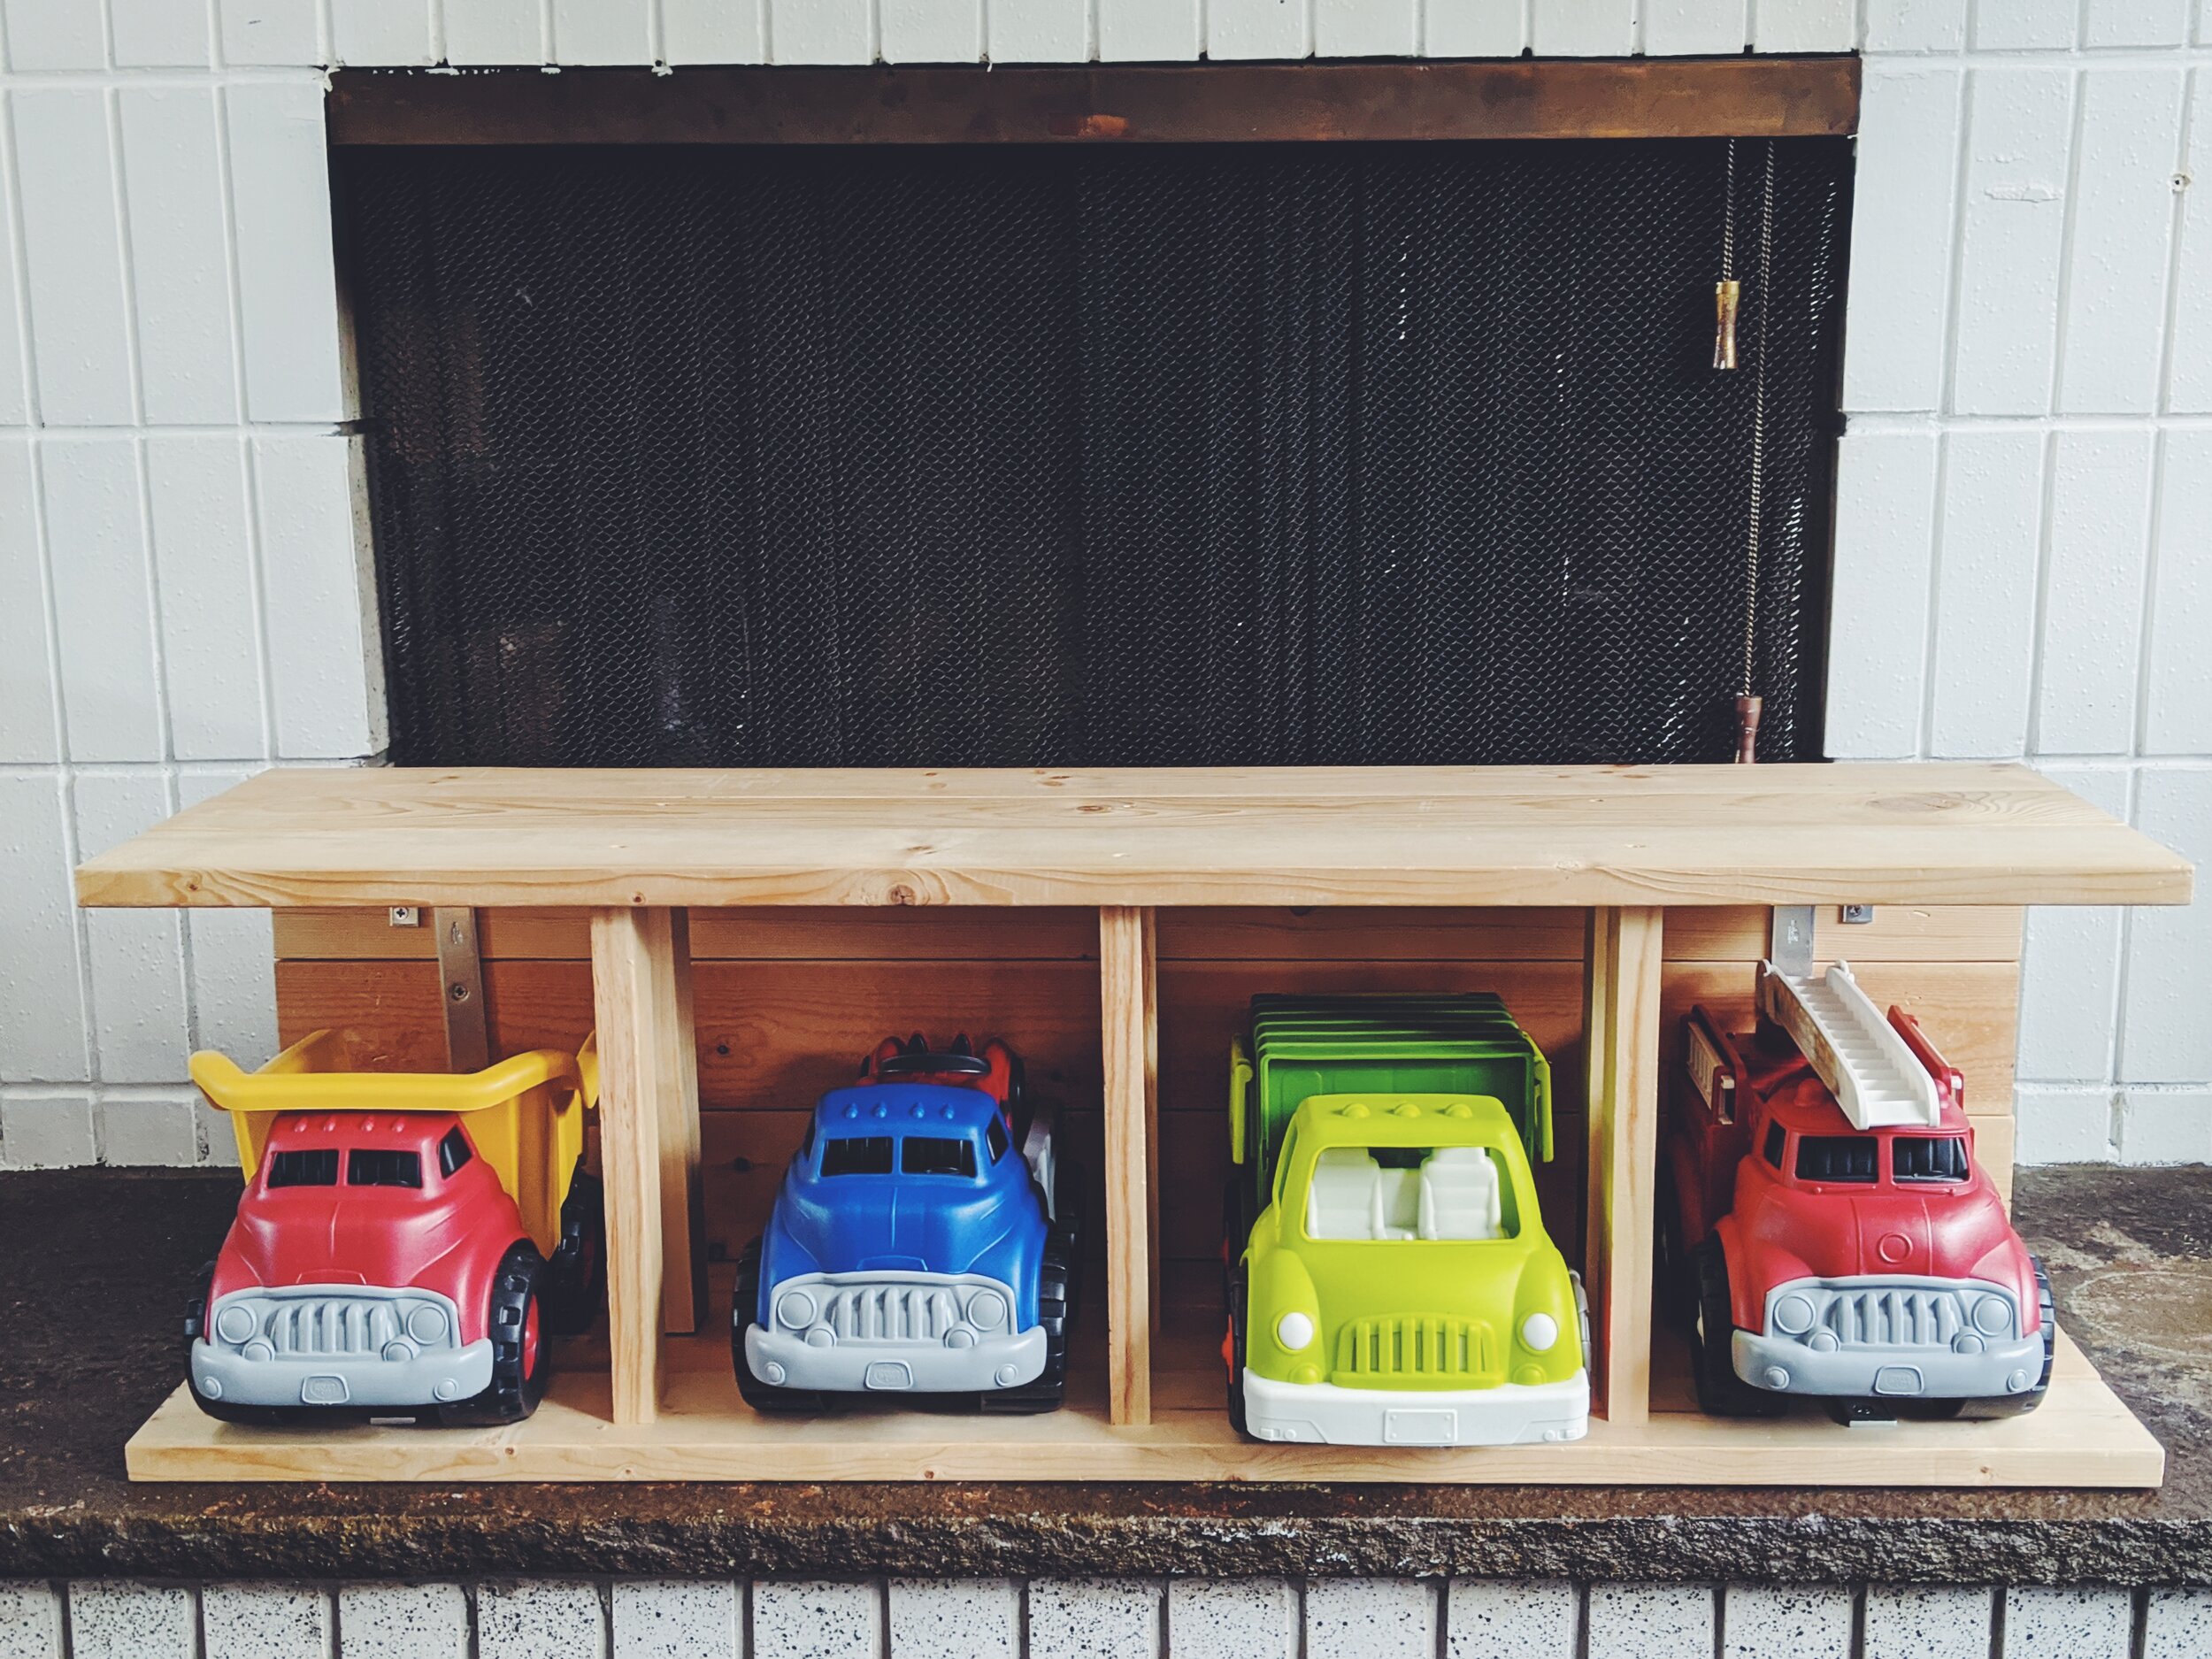
The dump truck, flatbed and fire truck are all Green Toys brand. The garbage truck is not and is a bit longer.
I’m excited to share this DIY Wooden Truck Garage with you. I don’t want to admit for how long I had held onto these wood bed frame slats or just how many trucks we have accumulated, but I can say that it felt really great to finally upcycle the wood and have a nice looking display for my son’s trucks. I made it well over a year ago and it’s held up great. These pictures are from just the other day. It’s both functional and aesthetically pleasing. I chose to keep the wood finish but you can definitely paint or stain this piece.
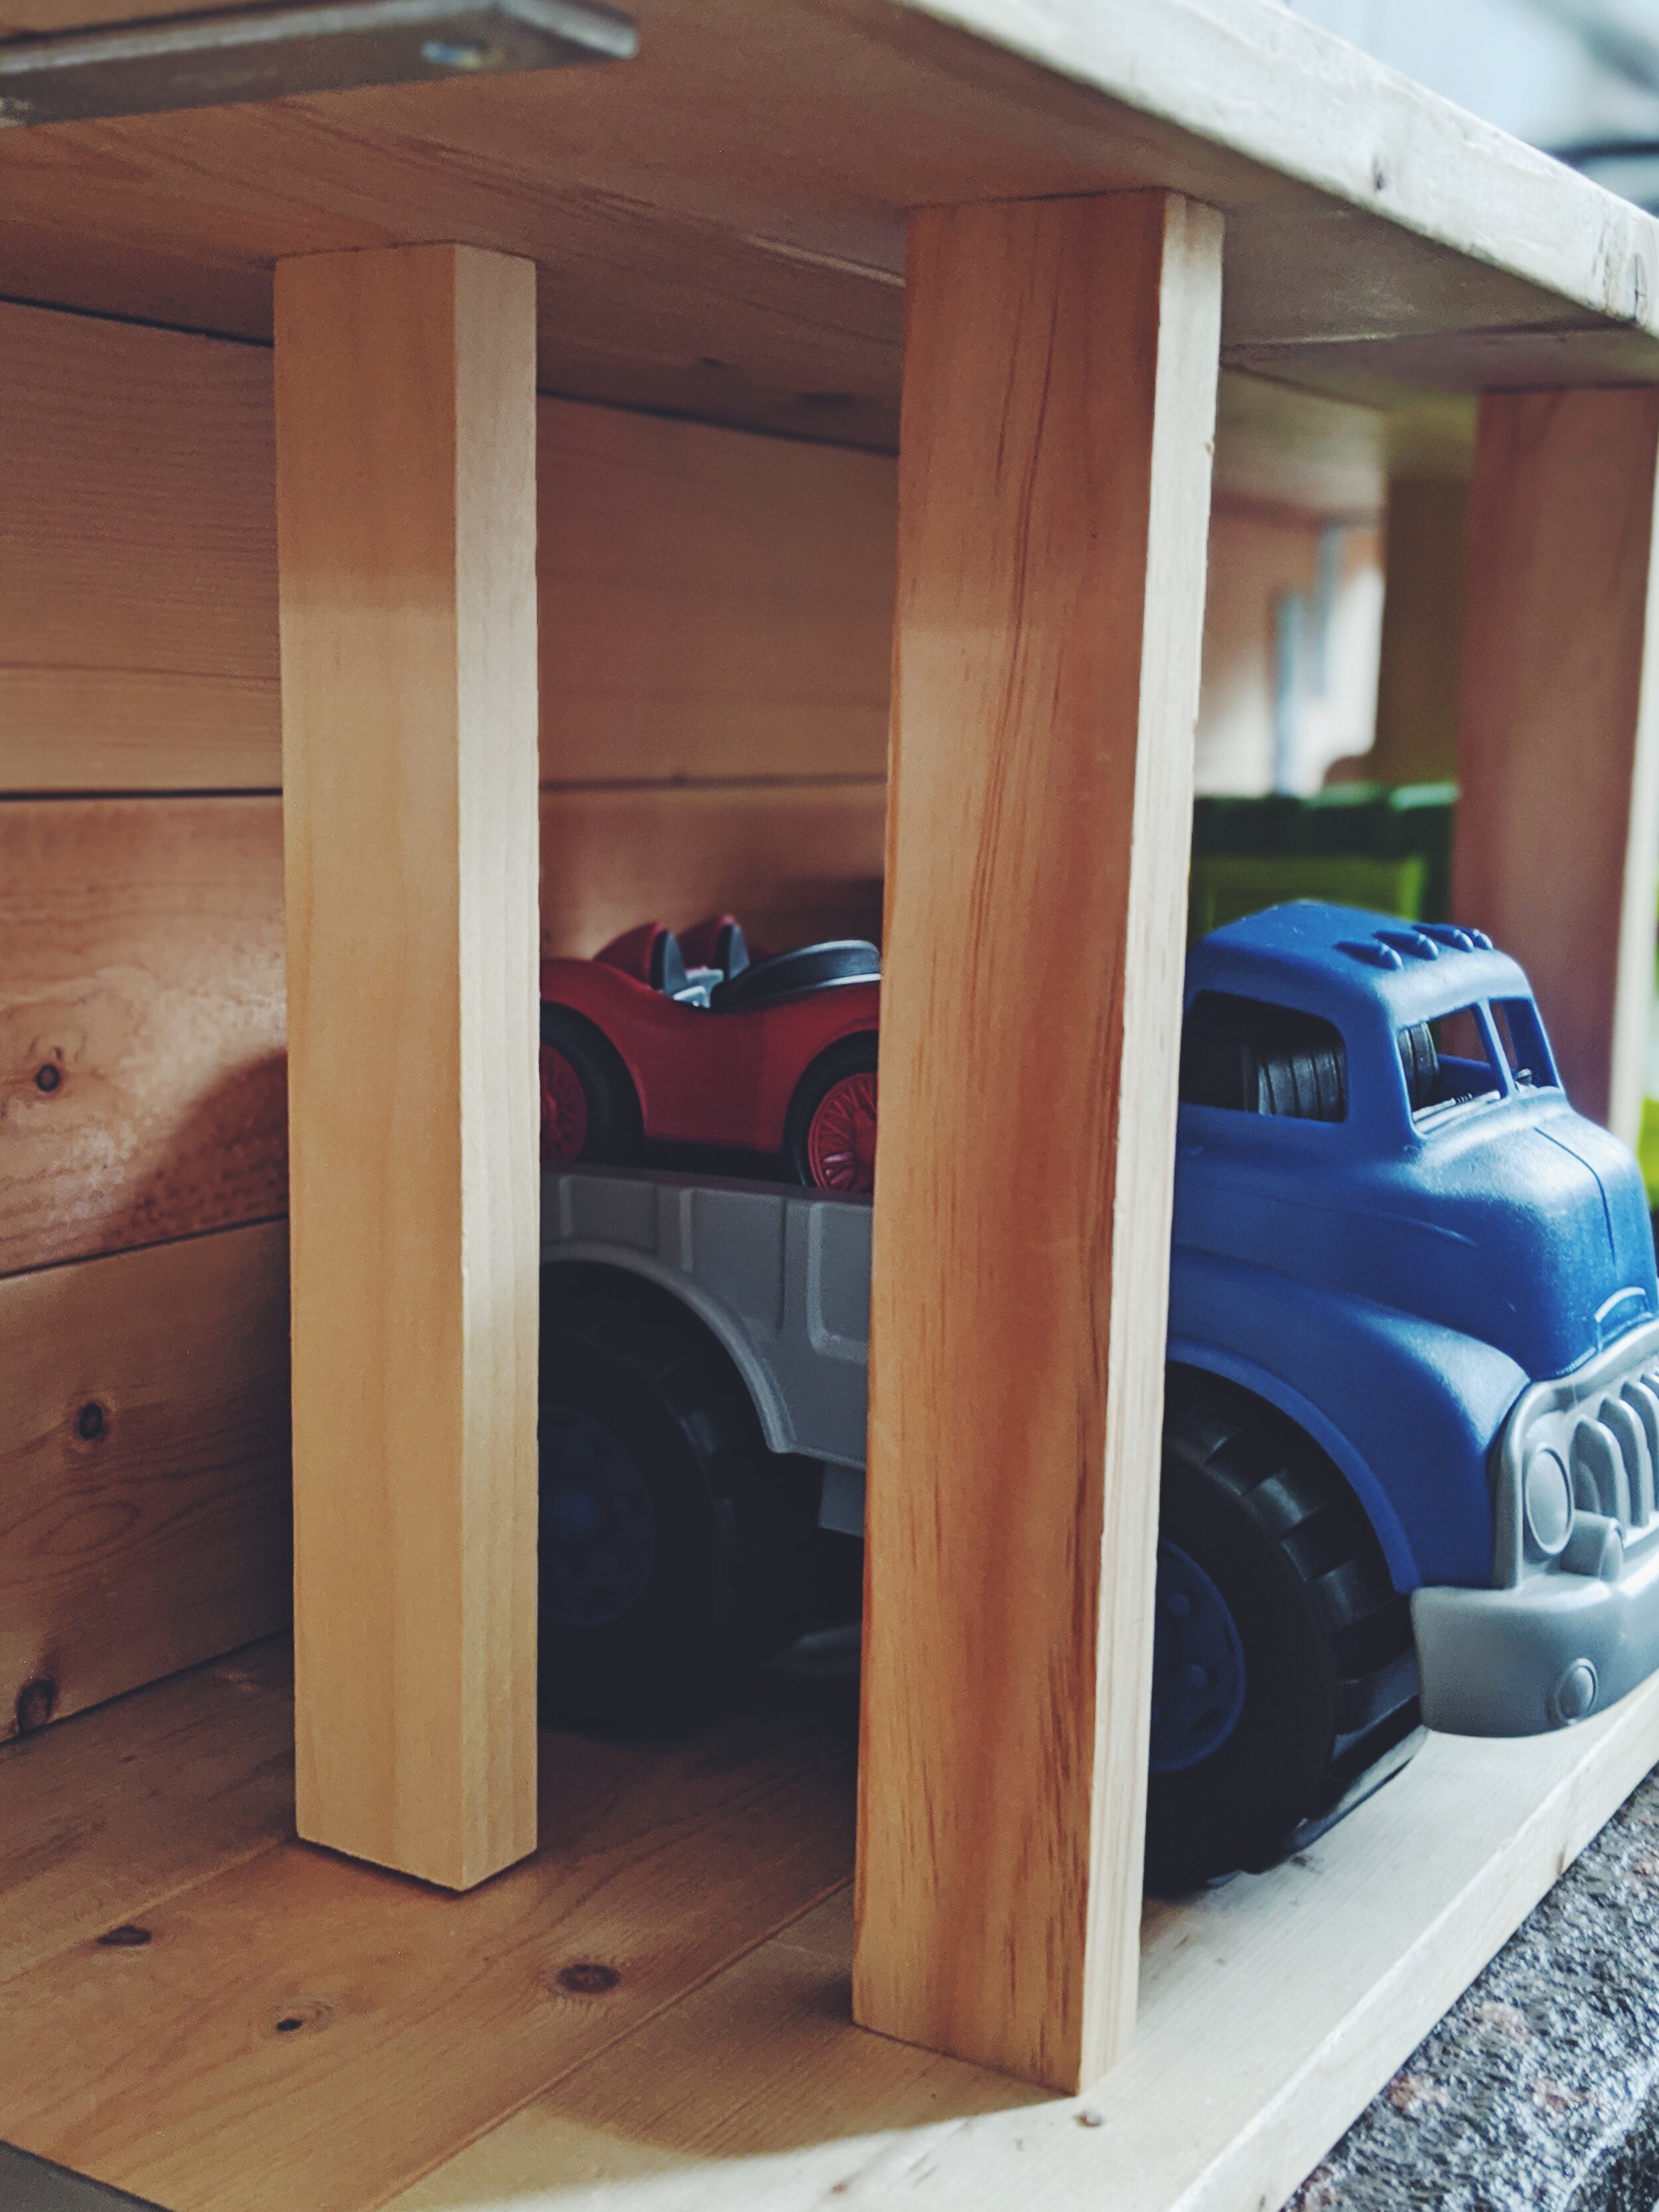
There is a lot of flexibility with this piece. It’s essentially a box with three sides open. I measured his most used Green Toys brand trucks and decided to go with three slats wide by four slats tall for ours. So feel free to do the same and pick your size based on what would be most helpful for your toys, in your space. Just make sure to give a little extra room to grow, especially on top, as dump trucks in this household are often piled high.


Here’s what you’ll need to get started.
Materials:
10x Slats - 1 x 4 x 38 inches
6x Support Posts - 1 x 2 x 10.5 inches
6x Straight Metal Brackets with screws - Mine are 8 inches with 4 holes
4x Corner L Metal Brackets with screws - Mine are 2.5 x 2.5 inches with 4 holes
Note: I always buy a box because if you’re into DIYs, you’ll need the common sizes again and it’s way cheaper than buying the exact amount needed.
Optional wood filler or putty to fill the screw holes
Optional paint, spray paint, or stain and brush
Note: These are my favorite paints, stain and brush. I use this brush all around my house. It’s the best.
Note: A smaller size stain would be plenty. I just can’t find a link on amazon. But again, if you plan to DIY often, maybe the larger one is a good investment.
Tools:
Note: I like Dewalt brand and definitely go corded versus cordless. They’re typically more powerful and how annoying is it to have to wait for a battery to charge, or have the battery or charger go missing?
Measuring Tape - Although, I eye balled a lot of this one.
A pencil! Your kid’s colored pencils would work just fine.
Sander - Either an electric sander or piece of sand paper or sand paper block
Optional - Tack cloth to clean up the saw dust. You can alternatively use a rag.
Optional - Clamps if you’re fancy or a perfectionist with alignment. I am neither.
A note on materials. The only thing I bought for this piece was the wood for the vertical support posts. I had the other wood pieces and hardware. The hardware is a little clunky so if you can find something slimmer, great. This piece is rarely empty in my house, so I don’t end up seeing the hardware often.
Steps - See photos.
Assemble the sides - Line up your three sides one at a time - the top and the bottom have three slats and the back wall has four slats. Place your straight metal brackets about four inches in from the ends, mark your pilot holes with your pencil. Remove the bracket and drill the pilot holes. Place the bracket back on top and drill in your bracket screws. Repeat on both ends of all three - the top, bottom and back wall.
Attach the sides - Line up a top or bottom piece (they’re the same) with the back wall piece. The back wall should sit on top of the bottom piece. Place an L bracket in place, mark your pilot holes with your pencil. Remove the bracket, drill the pilot holes. Replace bracket, drill in bracket screws. Repeat with the second top or bottom piece. It should rest on top of the back wall piece. This will make a U shape.
Attach support posts - Determine how wide you would like your openings to be. Mine are approximately 9.5 inches wide. For this distance, you would want to mark off at the 9.5, 19, and 28.5 inch marks on the middle slat and the one closest to the edge. This is one of the only times when measuring actually is important as you’ll want to line up your top and bottom pilot holes and screws. To be totally truthful though, I did mine mostly by feel.
You could also do just one post in the middle at the 19 in mark. You could also add two at the ends, about 1 and 37 inches.
I like having at least three support areas because my kiddo climbed on top in about .2 seconds after this was finished.
Fill the holes - Optional - You can put putty or wood filler into the holes to give this a smooth finish. Let it dry and sand off any excess in the next step. I skipped this but it would look nicer if I hadn’t.
Sand - You’ll now want to sand down the entire piece so that it’s smooth for the kiddos. Most important will be the ends. Brush off any sawdust. If you have a tact, use that. If not, a rag is fine.
Stain or paint - Optional - I typically do stain my projects and I love a deep walnut color but I was planning to put this piece by my dark fireplace and liked the idea of keeping it lighter and visually very simple. When I do paint, I tend to go for a white chalk paint or a matte black chalk paint. But feel free to get creative here!
Set up with your child’s favorite trucks, planes, trains, or other toys. You can even have a nice bin or basket in one area.
Add on ideas:
I thought about drilling in a little train track to the top to make a permanent track but ultimately decided against it so that the top could be more functional and so that the train set could be used in varying configurations. I do think it would be pretty sweet though.
A cool idea would be to customize to your child’s favorite theme. I think this could make for a great airplane hanger or fire station. You could paint on details too.
Make it two or three tiered. Include storage bins, etc.
A note on toy rotation - In all honestly, my son has dozens of trucks and this fits just four of them at a time. So, either he picks which ones he wants or I observe which he is playing with the most, what themes he’s really into and pick which make it into the rotation (i.e. collecting things - dump and garbage truck or playing fire chief - fire truck) and try to change it up about once a month based on if the toys are getting played with or not.
A note on open ended play - One of the most helpful adages I have heard for children is that active toys make for passive learners and passive toys make for active learners. Basically, a plain wood box would inspire a lot more creativity and active imagination play than a box that lights up and makes sounds. This piece is almost more like furniture rather than a toy but still, it is amazing to see the things that he comes up with for it, mainly “vrooming” cars on top and building train tracks attaching from the coffee table. I love watching him play with open ended toys, including furniture.
A note on carpentry and the root chakra - Right now, the world is at an upheaval. The Coronva virus threat has us all self quarantining at home. A shelter in place is no joke. It’s scary. There is a lot unknown. There is a threat to our basic survival. So in this time, along with following the obvious CDC recommendations of staying home, frequent hand washing, and wearing masks if you do go in public, you can also do a lot for yourself while at home to balance your root chakra to bring yourself some calm. Located at the base of your spine, it is known as the survival chakra and some activities to help balance it include working with wood and dirt. I highly recommend DIYs like this one to bring you a sense of security, as odd as it may seem. You can also see my last post for more activities to ground yourself and your child.
Did you make this DIY? I’d love to see it! Comment below or tag me on Instagram.

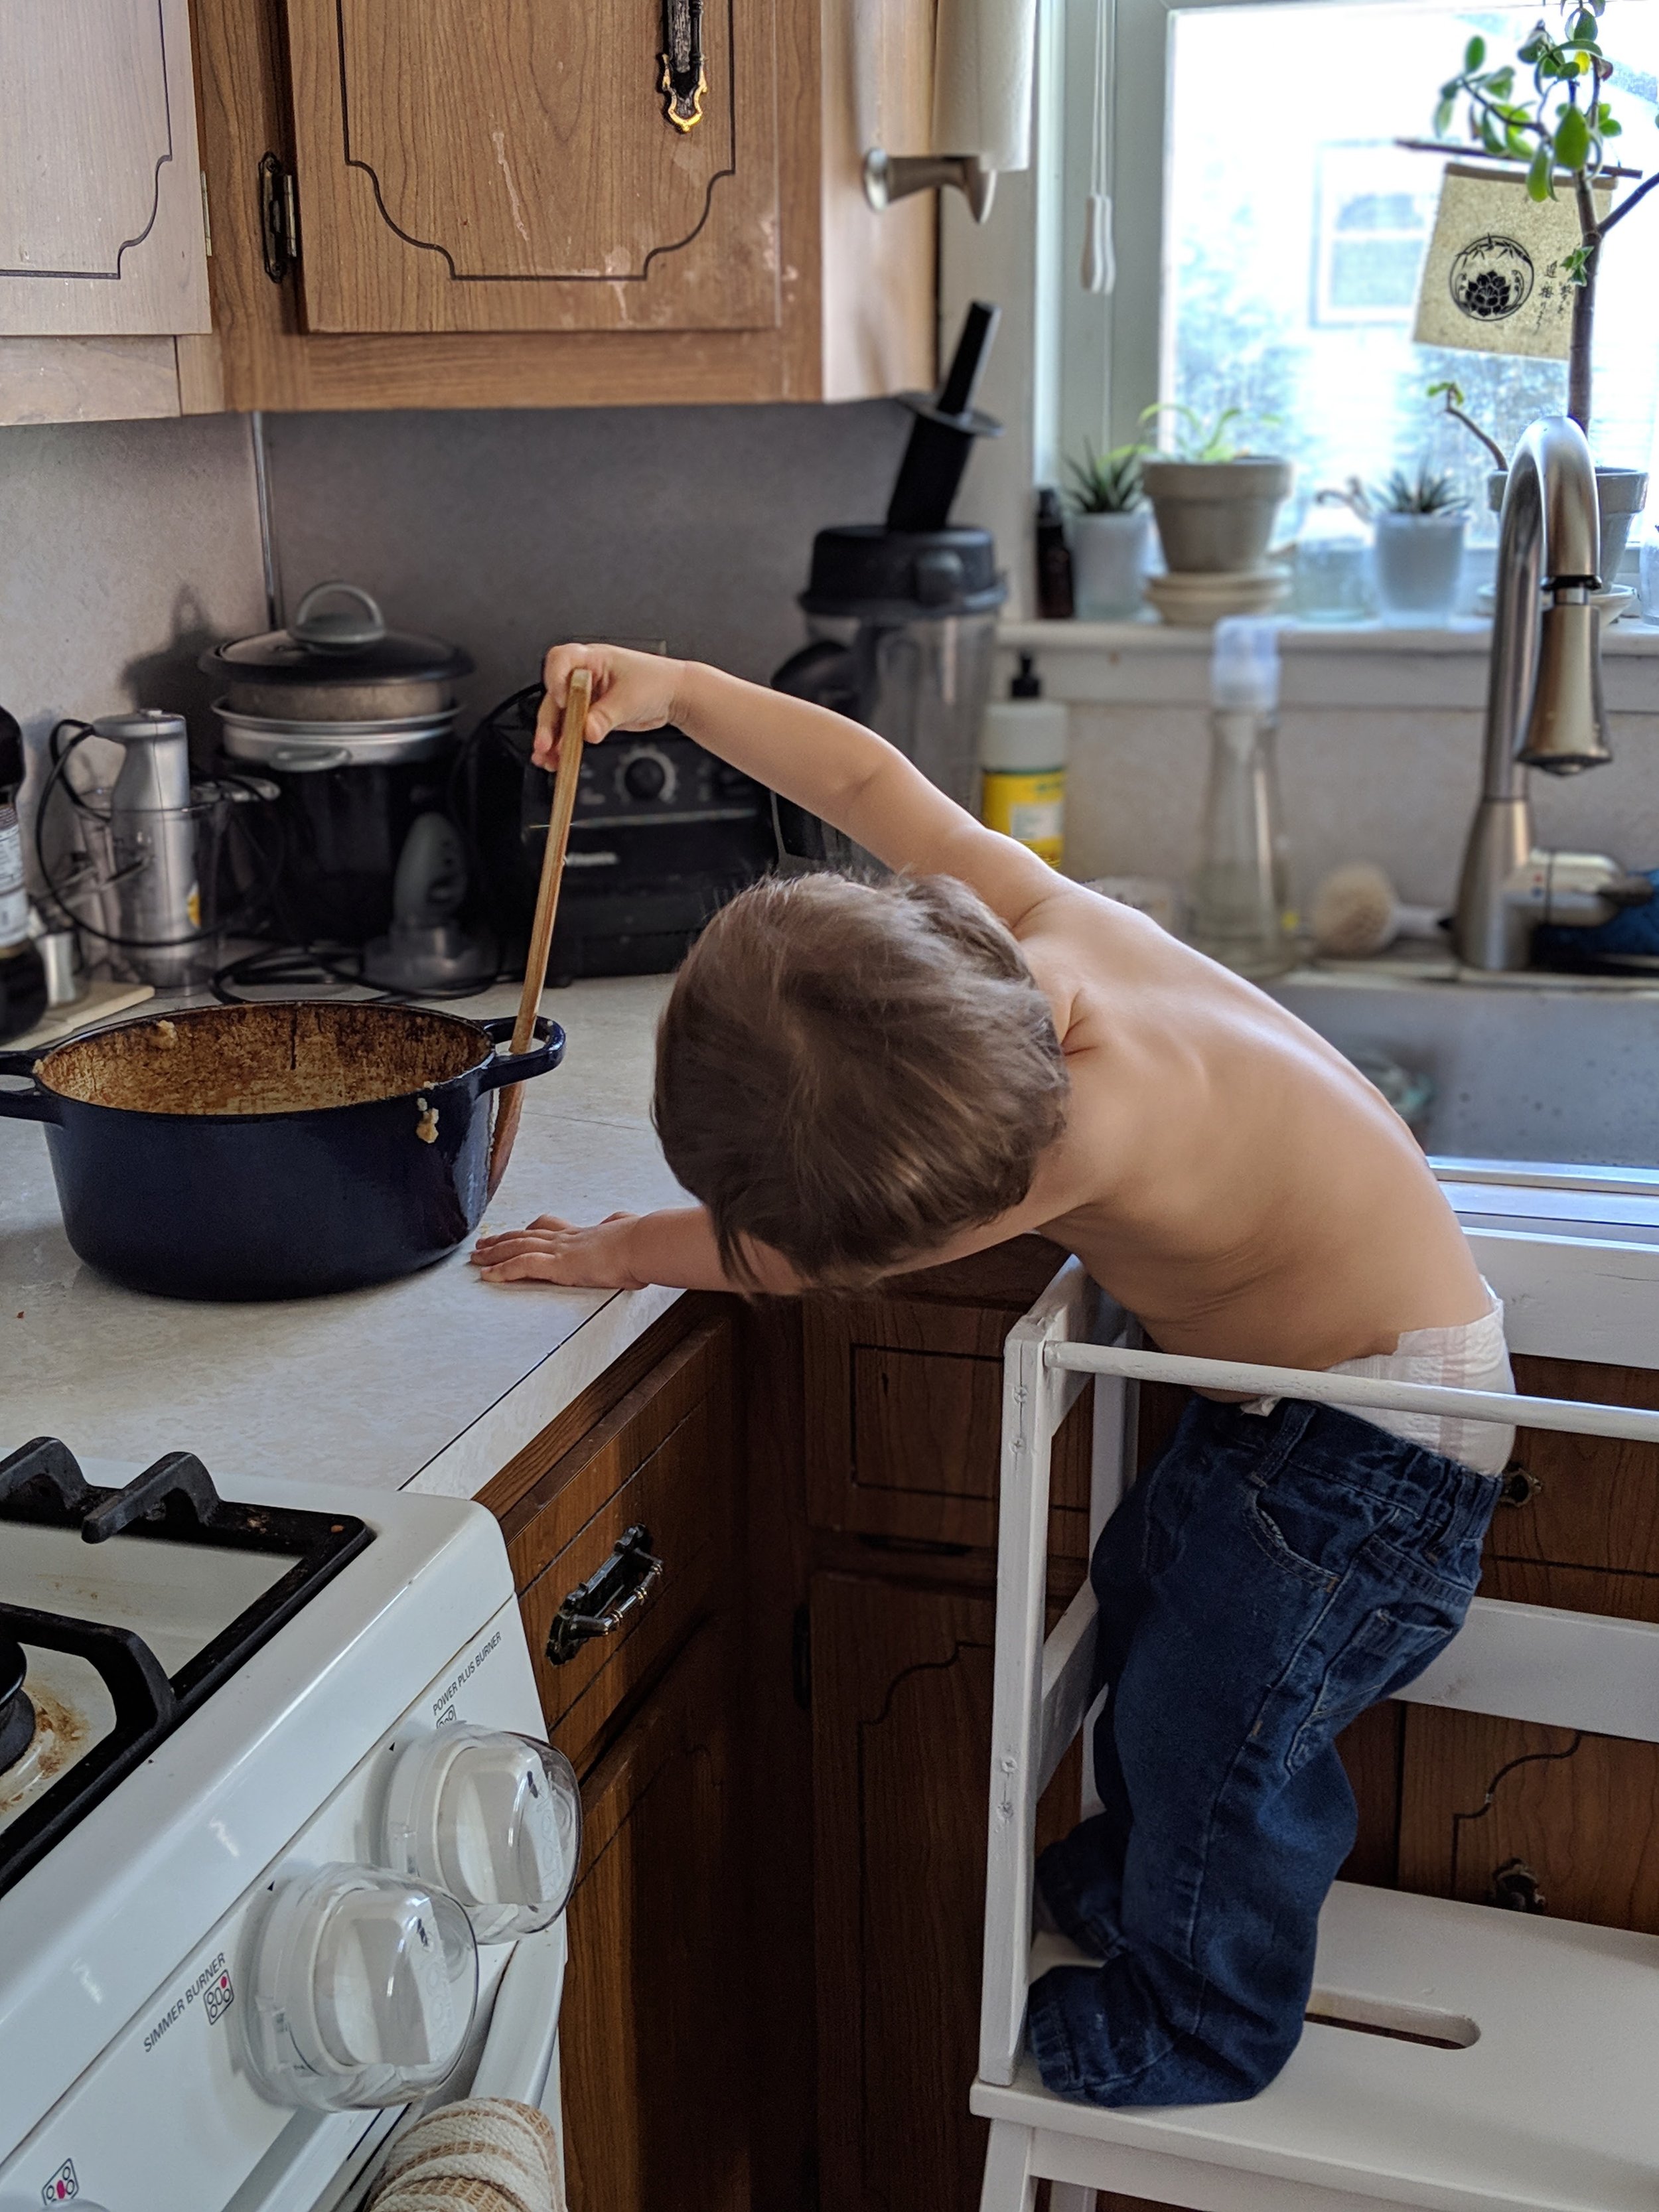
Real life
A note on affiliate links - This post contains affiliate links. The amazon items linked above are the same price to you, but a small portion gets kicked back to me if you purchase through these links.
For inspiration from our day to day life, follow us over on instagram @plantbasedbaby.us. Here’s a preview below of what you can expect.